Just the other week I wrote about Classic skiing, a discipline of winter sport under the “Nordic” umbrella. Hopefully you’ve given that article a read, but maybe you passed it over because you already know how to Classic ski – or perhaps because it isn’t fast enough for your tastes.
Either way, you’ve landed here to read about the other discipline: Skate skiing. Read on to learn the basics, what makes it different from Classic skiing, and how you can go about getting started on your own pair of skis!
What it is
If you’ve ever ice skated or roller bladed before, the gist of Skate skiing will be somewhat familiar.
The skis themselves are pretty similar to Classic skis (curved along the length), but unlike Classic skis that have grip underneath your foot, Skate skis are completely smoothed and waxed along their length. Skate skis also tend to be a bit stiffer than Classic skis, since the motion of skating pressures the ski towards the snow in a different manner than Classic skiing.
Some folks prefer Skate skiing because it is faster and tends to be more aerobic. If you are a cross-over summer athlete looking for winter activities to keep the heart rate up, Skate skiing might be for you!
How to do it
When first starting, you will want an open, flat area to practice in. However, a key difference between the two Nordic disciplines is that Skate skiing requires groomed terrain. It is very difficult to Skate ski through unpacked snow, which means the sport requires a bit more infrastructure to pull off. Luckily, in addition to any resorts that may be near you, many municipalities and parks offer groomed trail systems in the winter. In the Capitol area of NH, for example, we have multiple City-maintained groomed trail systems, and we are not far from the State-groomed Bear Brook State Park.
When first trying to skate, I recommend leaving your poles on the side of the trail. If you can learn to move efficiently without relying on your poles to push you along, your overall form will benefit.
The basic skate
Ultimately, forward force is generated not by stepping downward and pushing backward (as in Classic skiing), but by stepping sideways and pushing outward.
Position yourself in a duck-footed T-rex stance (so that your knees are bent for balance and your ski tips are splayed apart), roll the knee/ankle of one foot inwards, and then push off that leg while trying to keep that inside ski edge slicing into the snow. If all goes well (and the conditions aren’t too icy), the edge you establish will work like an ice skate and give you purchase. Pushing off that leg allows you to slide forward on the opposite ski, and once you’ve parroted the first motion on the other leg, you’ve got a Skate going.
It’s important to note that Skate skiing moves you forward down the trail, but in a zig-zagging pattern. Part of the reason why you need a wide, groomed trail is to accommodate the space required for the technique, since you move a bit from side to side as you glide down the trail.
Similar to Classic skiing, loading up the ball of your foot should pressure your ski to flex at the highest point of its camber. If you feel that it’s difficult to get an edge in the snow, you might not be loading up the ski in a way that best bends the inside edge to touch the snow surface. Play around with the motion and really try to get a consistent, solid edge.
If you are skiing somewhere with set track (two grooves in the snow on one or both sides of the groomed trail that act as guide rails for classic skis), you can isolate the skate motion in each leg by putting one ski in the track and pushing yourself along with the other ski in a Skate fashion. Then, reverse direction and practice with the other leg.
Arm movement
An important part of Skate skiing is transitioning your center of mass from side to side, from one ski to the next. A good way to practice this is to swing your arms like a speed skater (if you aren’t familiar, check out some Apolo Ohno highlights on YouTube), shifting your body weight from the pushing ski to the gliding ski.
This advice holds true whether you’ve graduated to using poles or not, but it’s easier to practice a dramatic swing of the arms when your poles are still on the side of the trail. We will discuss poling below.
Gliding
Every time that you push off one ski, you should then be overtop the next ski and gliding down the trail. As your balance improves, you will be able to do larger pushes and longer glides.
That said, maximizing your glide is not necessarily the end-game of Skate skiing; rather, your cadence should vary with the terrain you encounter. For flat or downhill areas, longer glides may do the trick. However, when going up a hill, you will need to quicken your transition from foot to foot so that gravity doesn’t bring you to a grinding halt as you travel upwards.
But what about my poles?
Here’s the tricky bit to convey via writing. The basic form of Skate skiing is an asymmetric technique.
Depending on whether you are left-handed or right-handed*, you will identify a dominant poling side. When Skating, you will only pole when you push off of your ski on your dominant side. You will then glide and reposition your poles while you are on the other ski.
On your dominant poling side, you will have a leading pole and a trailing pole:
- The outside (dominant) hand acts as your leading poll, and should be planted more vertically and in front of your body. You will be able to lean on this pole heavily, not strictly relying on your arm strength for power.
- Your inside (non-dominant) hand acts as your trailing pole, and should be planted down closer to your waist with a more extreme angle relative to the ground. This pole can also be referred to as your push-pole, since its positioning means it relies more on arm strength to push you forward.
The trickiest bit is getting the timing right for landing your poles on the ground while you are skating. The simple mantra to chant in your head (or aloud!) is “three-one”, meaning your pole strokes should strike the ground at the same time as your dominant ski does; when you push off onto your glide ski, your poles will be repositioning for the next step instead of planting in the ground once more.
All the above being said, a video is worth a thousand words. See below:
*Despite being right hand dominant, I personally ski “goofy” and prefer to pole on my left side. It’s all personal preference to start, though it’s possible (and recommended) to learn how to pole on both sides of your body to best fit the terrain.
When you should book a lesson
A good instructor will tell you that time on snow is your best teacher – and yet, it can be very detrimental to build muscle memory for an incorrect technique. This is especially true with Skate skiing if the timing of your poling is isn’t quite right.
I definitely advise you to get out a number of times on your skis to become comfortable before considering a lesson, but once you can cruise around without falling over you may want to consider snagging one at a local Nordic Center. This way you won’t be paying someone to watch you learn how to balance on skis, and instead your dollar will go towards meaningful instruction and actionable advice.
I certainly tried to write a comprehensive summary of the basics above, but there’s nothing quite like an in-person instructor to help assure that you’ve got the right idea and the correct form!
Equipment & where to find it
Nordic skiing still tends to be cheaper than Alpine skiing, but Skate skiing tends to be a bit pricier than Classic. Still, there are so many people that look to offload older gear throughout the year via yard sales, digital marketplaces, or ski swaps.
Oftentimes, the gear people are choosing to get rid of might not even be in bad shape; lots of folks splurge on a high-level set up, ski a few times, and then end up selling the equipment a few seasons later to clear up space in their basement. Their short attention span is your profit!
So what should you be looking for? You’ll need to get yourself a pair of skis, some comfortable boots, and a set of poles. Easy enough!
Skis: weight range is key
For just getting started, you should keep an eye out for a pair of skate skis that are suitable for your weight.
Ski design has changed over the years, so don’t believe anyone who tells you that the length of the skis is the determining factor – it can be nice to have shorter skis when you are first starting out, but an older ski in your weight range will very likely be longer than a more modern ski. Both are perfectly suitable.
Look for a weight range printed onto the surface of the ski to start, but if that is rubbed off you will want to consult someone knowledgeable.
Most ski swaps will have someone on hand to assist with testing the flex of a ski, which is important to make sure you are able to pressure the ski and get an edge every time you try to move. If a ski is too stiff for your weight/strength, it will be very hard to make solid contact between the inside edge of your ski and the surface of the snow.
If you are instead buying from someone directly, ask if they have a sense of the weight range, or see if you can find the ski online to determine its characteristics.
Boots: ensure compatibility with your bindings
Boots should fit like a running sneaker, and really tend to be pretty comfortable. A Skate boot will come up your ankle a ways, since the side-to-side nature of the Skate technique benefits from some additional ankle support.
Sizing is very often European, so you may want to have a conversion table on hand when perusing for gear.
The only tough part with boots will be making sure that what you are buying is compatible with the bindings of your skis (and to that point, I have assumed above that a used pair of skis is coming already mounted with a bindings setup). There are a few different styles of bindings and corresponding boots, and while there is some interchangeability between them, it is always good to be sure that what you are buying will work with what you have.
I am not going to go into much detail here, but a simple approach is to have either the skis or boots (whichever you bought first) on hand for when you are getting the other item. This way, you can try to snap the boot into the binding – you will find out very quickly if they work together or not!
Poles
Poles should be a little easier.
Really, you are just looking for two matching poles come up to your upper lip/just below your nose when standing straight. This quick measurement is easy and determines if a pole is the right height to correctly complement your skating technique.
Beyond that, I think there are three considerations for poles:
- overall weight
- size of the snow basket
- type of grip strap
Some simple, older poles are probably made of a heavier material, have comically large snow baskets and a simple loop strap for your wrist. However, these sturdy implements might come cheap and certainly will get the job done – though larger snow baskets are cumbersome and unnecessary for groomed terrain!
If you instead want a more modern pole, look for smaller asymmetric snow baskets and a Velcro grip often referred to as a “power strap.”
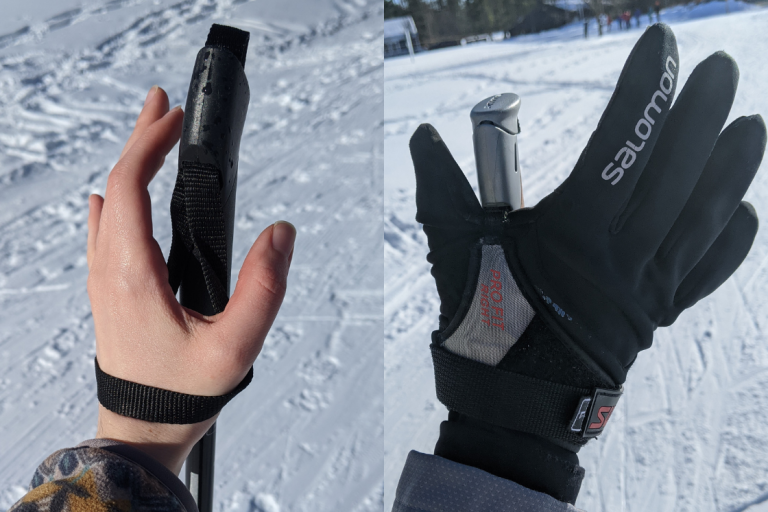
The lighter a pole is, the easier it will be to maneuver when you are tired while on a long ski outing, and the power strap allows for more connection between your hand and the pole without needing to have a death-grip on the handle. More so than Classic skiing, I really recommend a “power strap” pole for Skate skiing.
Give it a go!
Before you head outside, it’s worth noting that Nordic skiing is more cardio and sweat-inducing than other winter activities, and Skate skiing more so than Classic skiing. It’s worth having some water/wind-resistant clothing that isn’t your big parka or insulated snow pants. Layers are key because you will likely start out rather cold and then get increasingly warmer as you go.
Now get out there and have some fun!